Make sure you sign up on my mailing list (just below on the right) before you leave! Your address is SUPER safe with me.

Friday, August 29, 2014

Altering Your Images: What Is White Balance?

Summarizing today's post: White balance in photography, how to change the color tone in your photograph, Photoshop, & having fun with your camera settings.

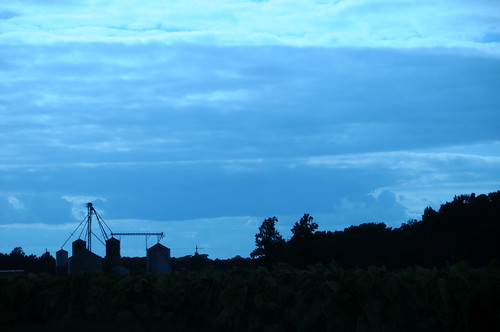
90mm, ISO 200, f/5.6, 1/1600th of a sec, WB set to tungsten
Have you ever felt like you have been missing out because you don't know a lot about image editing software? Photoshop is a great example. Photoshop is fairly expensive and complex way to edit photographs. And it can seem overwhelming.

Worse than the expense, it takes precious TIME to edit your photos. Time is a commodity many do not have extra to spare these days.

I have used Photoshop and other image editing programs, but what I find is that I reap much more enjoyment out of taking the photograph, rather than being in front of a computer screen. Software editing (although sometimes it's inevitable to save an otherwise bad image) is work, shooting is not...that's the fun part.

In addition to it simply being fun, I find it to be a challenge to capture an image correctly the first go-round...while in the process of taking the photo. It's more natural--more realistic--this way as well. Does it take a little more effort? Yes, but it's a learned process. It's also the reason I encourage shooting by using the manual controls on your camera when possible. (For more on shooting manually, see here.) 

I will get off of my soapbox about Photoshop. Bottom line? Leave Photoshop to the professional photographer.

So having talked about "capturing an image correctly", what about altering an already "correct" image? [Correct meaning perfect exposure, good lighting, subject/object situated just right, etc.] Afterall, photo editing is used just as much to alter a correct image (to make it more interesting) as it is to try and save an incorrect, flawed one.

Let's get into some interesting ways to alter a plain-looking image while you are still standing in front of it. One easy way to make a photo look more interesting is to change the color tone. Let's talk about white balancing a bit.

You can really get into some technical jargon when talking about white balancing (WB), so I am going to spare you the details. The main thing to know is that by selecting different white balancing settings, you can change the mood of a photo quite drastically. Most often, you will find your WB setting already set on AUTO in your camera. 

Mine was, when shooting the photo above...and I didn't like it. I decided to play a bit. I set the WB setting to "tungsten" and shot again. It's still not the perfect image (I was being picky that day), but by shifting to tungsten it gave the color tone a very blue feel. It took the cloudy sky over that tobacco field and gave it a completely different look. Pretty neat.

The "tungsten" white balance setting is like that. It will always make your images more blue and give it a cool feel. Other WB settings? 
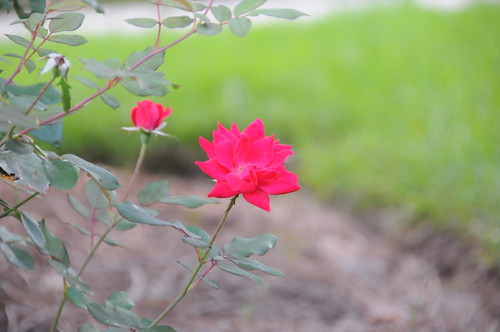
200mm, ISO 800, f/5.6, 1/20th sec, ambient only, WB set to Auto
How about the "shade" setting? [Most likely on your camera it will be portrayed as a little house icon that's casting a shadow.]

Take a look at the photograph at the left. I first shot this pretty little flower at AUTO. Not bad...good enough to show you even. However it wasn't "warm" enough for me. This was because I was shooting in low light at the end of the day (the sun had long ago set).

So to warm the image up a bit, I took the white balance setting off of AUTO and selected "shade" instead. Here's what I got: 

shot at 200mm, ISO 800, f/5.6, 1/20th of a sec, ambient light only, WB set to shade
Now that's an image to show you! What a difference. Look at the color tones. This photograph will likely give the viewer a nice warm fuzzy feeling...much moreso than the first in comparison.

So there you have it. An intro to White Balance. There are other WB settings you can play with too, such as "sunlight", "cloudy", and "fluorescent". However, I have showed you the most drastic of the bunch today. The point is, take it off AUTO and experiment.

Remember... "tungsten" to make your image more blue and give it a cool feel, and "shade" to make your image more orange and give it a warm feel.

Go play, and leave Photoshop alone.

[Note: This is part 1 of using white balance to your advantage. Next time, I will touch on using this same in-camera adjustment to make an image look better INDOORS.]

Thanks for reading!

Brant


Wow, look at you...you made it all the way thru my post! I really appreciate you as a reader. Don't forget to register your email for automatic updates up at the top. Please pass this blog post on to your friends using the Tweet, Facebook, and Google+ buttons. That would be awesome.
Monday, August 25, 2014

Photo Tip Monday: Keep It Simple

Summarizing today's post: Photo tips, keep your photographs simple, ambient only lighting, stay open to possibilities, carry your camera with you at all times.

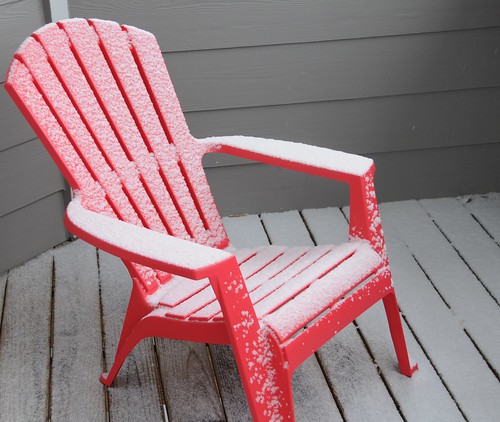
shot at 36mm, ISO 200, f/5.6, 1/60th of a sec, ambient light only
It's Photo Tip Monday, and I've got a quick one for you.

Sometimes people (self included) want to over-complicate a photograph. It's got to be perfect, the subject/object has to be situated just right, it's too dark so you need to add your own light, there's clutter in the background...the list goes on.

And if those many variables can't be adjusted 'just so', then forget it. Photograph lost.

So basically, your photo tip for today is to not try so dang hard.

I have found that the best way to capture a good image is to keep my eyes open to anything that is not quite normal. And when I do, I take advantage of the opportunity. It's really all about keeping your camera with you at all times so you CAN click photos of the not-so-ordinary when it occurs. (see the Camerawith! challenge here.) 

Case in point. Look at the photo above. It's just a chair. But it's simple and unique because it's something you don't see everyday. It has a little dusting of snow on it, which against the color red is very pretty. Ambient only lighting (no flash) was plenty, nothing fancy was needed. Nothing adjusted. I just kept it simple and snapped the photo.

I like it.

So remember: keep it simple, don't try so hard, keep your eyes open and be patient, and of course...carry your camera with you at all times.

Have a great Monday and thanks for reading!

Brant


Wow, look at you...you made it all the way thru my post! I really appreciate you as a reader. Don't forget to register your email for automatic updates up at the top. Please pass this blog post on to your friends using the Tweet, Facebook, and Google+ buttons. That would be awesome.
Friday, August 22, 2014

Photography And Happiness

Summarizing today's post: How photography is linked to happiness, photography as an amplifier, carrying your camera with you at all times.

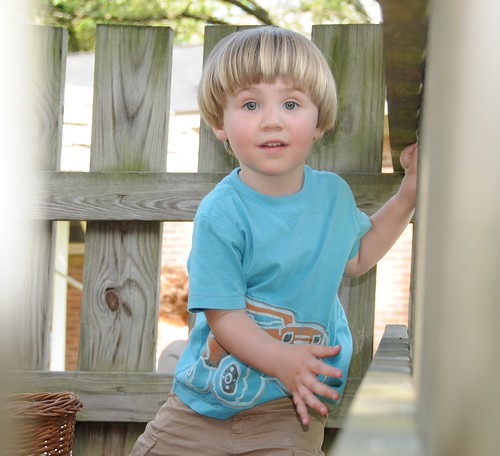
46mm, ISO 200, f/5.6, 1/125th of a sec, on-camera fill added
Photography equals happiness. At least it does to me.

More specifically, photography is an amplifier--a megaphone--to whatever makes you happy in this life. 

To me, I find happiness in photography in two ways. One, I find joy in the process of taking photographs. The mechanics and science behind getting that perfect shot. It simply "floats my boat" for some reason I can't explain.

Some people eat and breathe football, racing, boating, hunting, fishing, (etc, etc.) because it makes them happy for some reason. Can they explain it? Perhaps. But it's just something about that sport or hobby that makes sense to them and they can loose themselves in it. It makes them happy. Although I find joy in other hobbies, nothing compares to photography. It makes me happy simply to pick up my camera for a couple of hours at the time and just play (for more, see here).

So...that's the first way happiness is linked photography. The process and science behind getting that perfect shot. Only the amateur photographers out there, like myself, truly understand this. And that's okay.

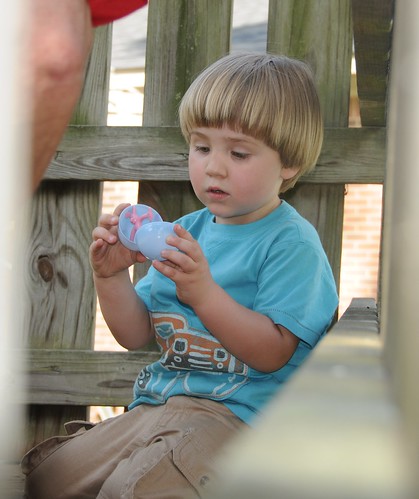
The second way I find happiness in photography is what most people can identify with. That is: I find joy in capturing images of things in this life that make me happy all by themselves. This is where the majority of people find happiness in photography. I could put hundreds of photos up on this page to show (broadcast) what I find joy in, but I picked Gavin today. He gives me extreme happiness. I could have just as easily picked a photo of my wife, other family members, photos of the beach, mountains, sunsets, cloud-filled skies...the list goes on and on. All give me joy.

All people like to look at photos of whatever makes them happy in this life. It amplifies their happiness to do so.

How many times do you start looking at photos you have on your phone, camera, or computer, and suddenly have a crowd of people looking over your shoulder smiling? 

Perfect example was when I was taking a family photograph of us a few weeks ago while on vacation. Most everyone wanted to see the photos on playback mode right then...and as they were looking, they were smiling. It brought them happiness, as it did to me too.

David Hobby--the famous modern-day photographer--calls photography his "special sauce" (see his blog post here). What he is referring to is this: Photography does not define who you are (even if you're a professional), it simply is a wonderful skillset you possess. And with that skillset, marvelous things can be accomplished.

What David calls his special sauce, I call my megaphone. Megaphones amplify your voice to allow many people to hear what is already being said. In the same way, I use photography as a tool to broadcast what I love in this life, what I find joy in, what I find happiness in. So can you.

40mm, ISO 200, f/5.6, 1/60th of a sec, on-camera fill added
I always encourage folks to open their eyes to the beautiful world in which we live and pause for a bit, just to take it in. While you are there, take a photo. Cherish it long after the moment has past.
Carry your camera with you at all times, and broadcast your happiness. It's what I call the Camerawith! Challenge (for more, see here).

I hope that you can now see how photography is linked to happiness. Even if you know nothing at all about a camera and can only snap photos with your cellphone, that's fine. Take tons of photos of whatever you find joy in, and broadcast it for all to see. You will become a happier person and you will bring happiness to others as well.

I challenge you to find a creative way to capture a few images of something today that "floats YOUR boat" and post them on your Facebook page, Twitter or the like. Or simply email them to a friend. 

Spread your happiness. Get out your megaphone.

Thanks for reading!

Brant

Like it here? Resister your email for automatic updates up at the top. Please pass this blog post on to your friends (if you think they would like to read it) using the Tweet, Facebook, and Google+ buttons.


Monday, August 18, 2014

Photo Tip Monday: Professional Photos With One Simple Adjustment

Summarizing today's post: Taking professional-looking photographs, aperture and depth of field, adjusting to manual mode.

shot at 50mm, ISO 200, f/3.2, 1/800th of a sec
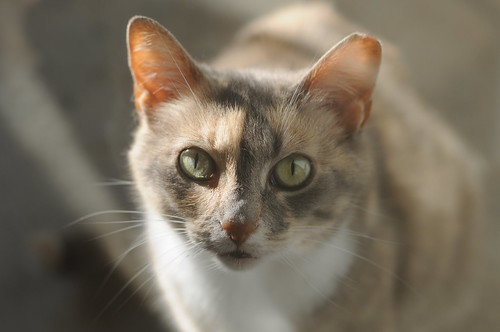
It's Monday, the dreaded first day of the work week for most of us. Therefore, I'm going to try and make it a little better for you by making you smile. Spooky, our loving pussycat, tends to make folks do just that...smile :)

On the first day of the week I try to give you a quick photo tip that you can use to make you photographs just a little bit better. And I've got a good one for you today...and simple too.

If I had to narrow down the single most thing that I could tell you to do with your camera to take a professional-looking shot, it would be to adjust your depth of field. But what is that?

I have touched on depth of field in a recent blog post (see here), so you may want to backtrack for more explanation. But in short, here it is. Do you see how "blurry" the background is around Spooky's face in the photo above? This is an example of a very shallow depth of field. This all but forces the viewer's eyes to her face, which is in crystal clear focus (the only part of the whole photograph that IS in focus).

How did I do that? Here's how...

A professional camera is not needed, however you do have to be able to adjust the aperture (the f-stop number) on what ever camera you are using. So put your camera in manual mode. The quickest way to figure out how to do that is look in your camera's owner's manual.

The larger your aperture (the lower the f-stop number) the more "fuzzy" your background will be. Get in tight on your subject and lower it down to f/3.2 or below. This is what I did with Spooky and it turned out pretty well. Nice and professional looking.

Play around with depth of field. You will take photos that will make your viewers say... "Oh!"

Thanks for reading, and have great Monday!

Brant

Like it here? Resister your email for automatic updates up at the top. Please pass this blog post on to your friends (if you think they would like to read it) using the Tweet, Facebook, and Google+ buttons.


Friday, August 15, 2014

Macro Photography: Appreciating The Little Things

Summarizing today's post: Introduction to macro photography, tips and tricks, appreciating nature, taking your camera with you at all times.

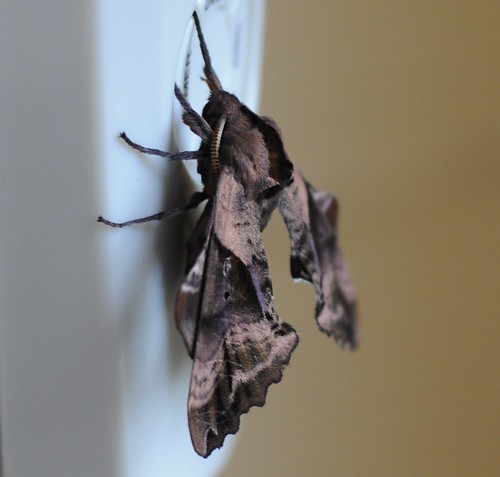
50mm, ISO 400, f/2.8, 1/60th of a sec, natural light
Marco photography...what is that? Basically, it is the art of getting in super close on an object with your camera. To me, here's what macro photography really is: Taking the time to isolate one of God's tiny miracles and capturing it forever by way of a photograph. This is about appreciating what surrounds us every single day.

Just have a look at this beautiful moth found right outside my door. I'm not a moth expert, but it appears to be a sphinx moth. He's about an inch tall with striking patterns all over his wings and body. For a moment in time, I isolated nature's beautiful creation and captured its image. 

I think this stunning creature deserved a little attention, don't you? This is what macro photography is all about.

The neat thing about macro is that you can improvise in the case of not having the fanciest equipment. If you do a little research, you'll find real quick that a very specialized lens is required to do true macro shooting. I hope to acquire a macro lens one day, but for now I am improvising. And that's okay. Photography (of all types) is about using what you have. "Gear" is something you'll always need more of, so get used to "needing" more and more. (FYI, I touch on ways to obtain used equipment here.)

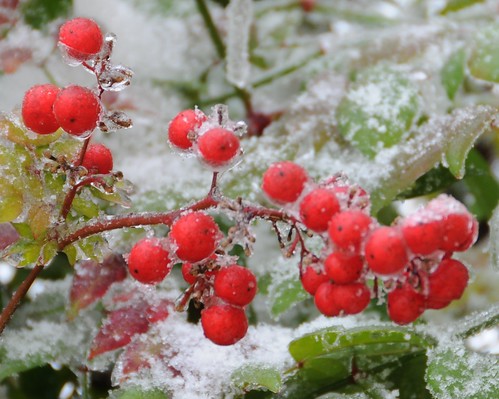
200mm, ISO 200, f/5.6, 1/160th of a sec, natural light only
Here's another macro shot I took back in the wintertime of a Nandina bush. The frozen berries stand out very nicely against the ice-covered leaves. I had to capture it in a quick photograph.

Working with a true macro lens, I could have physically gotten within about 6-12 inches from the berries when photographing. Since I was shooting with a regular 28-200mm zoom lens, I could not do that. Focus could not be obtained that close up. I zoomed in to 200mm and backed up about 4 feet. 

Do you notice how some of the berries are in focus and some are not? That's because my aperture is set very wide at f/5.6 (more on aperture here). This draws your eyes naturally to the 4 or 5 berries that are in crystal clear focus, putting emphasis on them. [Note...when using a true macro lens, you need to set the aperture as low as possible (highest f/stop number).]

50mm, ISO 200, f/5.6, 1/250th of a sec, strobe added at 1/6.4 pwr
One last photograph and that will do it for today. 

I was leaving work one day, looked down, and found this little crystal rock lying on the ground all by itself. I brought it home and my wife cleaned it up real good (she'll clean anything if it stays around for more than 5 minutes.) It was more beautiful than I first thought.

I figured I'd take a macro shot of it and capture it's natural beauty before I lost it.

This photo is a little different in a couple ways. In the first 2 photographs, I went to the object in it's natural environment. This time I removed the object and brought it into my environment. Secondly, I used my own light, not natural ambient light. Nothing wrong with either, things are just different. You will find that you have more control in a situation like this.

So here's my setup: I put our little rock on a mirror to give it a nice clean background. I "killed" the ambient light in the room by using a high shutter speed. Setting up my SB-800 strobe at 1/6.4 power and pointing it straight up to the ceiling gave me plenty of light. I used my 50mm lens and stood back about 2 feet. After about 5 or 6 tries, I got the shot I wanted. 

Pretty neat. All three of these photos were done without the "proper" equipment. You can even do this with your point-and-shoot camera with decent results...especially if you can put it manual mode. Just play around with it. 

I hope this has given you some inspiration to jump into the world of macro photography. It is all about appreciating the beautiful things in the world in which we live. Take time today to notice the little things in nature, the things most people walk right past and ignore.

Don't forget to take your camera with you today. You never know what you'll run across!

Please leave comments if you have story to share.

Thanks for reading!

Brant

Like it here? Resister your email for automatic updates up at the top. Please pass this blog post on to your friends (if you think they would like to read it) using the Tweet, Facebook, and Google+ buttons.


Monday, August 11, 2014

Photo tip Monday: Off-Camera Lighting For Beginners

Summarizing today's post: Inexpensive off-camera lighting, photography & lighting for beginners, manual mode photo tips.

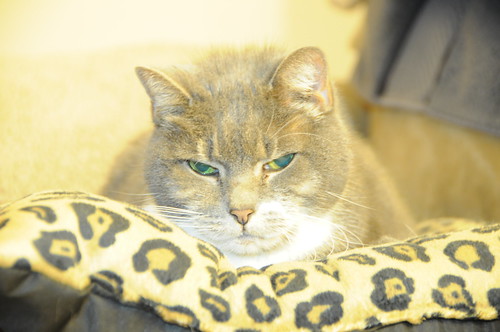
shot at 120mm, ISO 800, f/5.3, shutter speed 3 seconds
It's Phototip Monday and I've got an angry-looking kitty to start your week off right. 

She's not really angry...I believe that's a look of tolerance. Daddy won't let her sleep!

Let's get to the tip:

You have heard me talk and talk about off-camera lighting. (If you're a new reader, click here.) But what if you don't have all the gear yet to play?

Don't worry. There's so much you can do with what you have already! Example?

Just to play around and prove this point, I set up my camera in front of Kitty just the other day and balanced it on a pillow. I put all settings to manual mode and exposed for the ambient light in the room (which wasn't much light at all). Note I have a very slow shutter speed of 3 whole seconds. That's sloooow. (Hence the reason for balancing on a pillow.)

Guess where I the added light came from? My cell phone flash light app. I could have just as easily used a regular flashlight. I held it up above the camera about a foot and a half...just enough to get a burst of off-camera light. Not the best quality photograph, but point made.

Even if you have a regular ole point-and-shoot camera that you can't put into manual mode, you can still try this. Simply turn your flash off beforehand. 

Off-camera lighting beginners... go play and have a little fun.

Thanks for reading, and have great Monday!

Brant

Like it here? Resister your email for automatic updates up at the top. Please pass this blog post on to your friends (if you think they would like to read it) using the Tweet, Facebook, and Google+ buttons.


Friday, August 8, 2014

Sell Your Stuff Like a Pro

Summarizing today's post: Taking professional photographs to make your stuff sell online thru various online venues, off-camera lighting, macro photography.

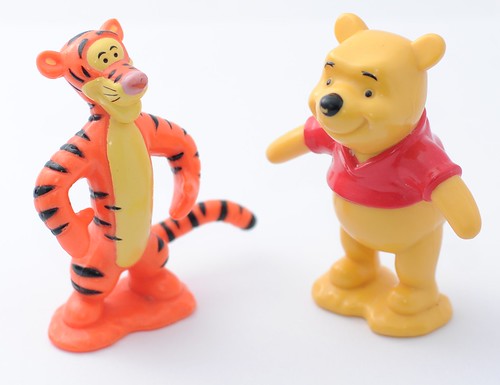
50mm, ISO 100, f/3.5, 1/250th of a sec, strobe 1/128th power
Today I am going to teach you how to defy the laws of physics and make things float in space. Yes really! (Well, not REALLY...but almost.) I will demonstrate to you a neat little trick using things around your house to build a professional miniature studio. In this little mini-studio you can work photography magic.

Now why in the world would you want to make things float in space you ask? Good question...bare with me.

I went thru a phase several years back where I was selling a few things here and there on eBay. I needed some extra spending money, and I was trying to sell off some things I didn't need anymore. The main thing I learned from that experience is that if I took the time to take a quality photograph of the item I was selling, it sold a lot quicker. The effort paid off.

It's funny how things work out...how your life sometimes "doubles back" and touches another part in the past. At the time when I was all 'into' selling my unwanted stuff online, I really didn't think that anyone would be interested in how I photographed the item in my listing. But now, 10 years or so later...I thought you might be interested.

So this post is for anyone who has ever dabbled into selling their "stuff" online thru eBay, Amazon, Craigslist, etc. Also, this information would interest you if you have precious items you simply want to photograph in an isolated environment for other reasons (and there are endless reasons). Then there's those who will take this info, run with it, and just have fun with their imagination. 

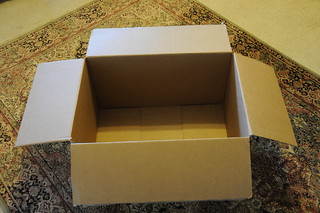
Okay, let's build that miniature photography studio first. I'm going to show you some snapshots of the building process (nothing high-quality about these images...just for demonstration purposes only)...


Find yourself an old cardboard box in decent shape. Mine is approx 18in x 30in x 24in.


Grab a stack of plain white copy/printer paper and some scotch tape.


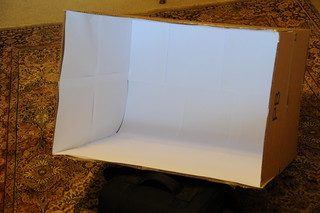
Start from the back of the box and tape your sheets of paper side by side. Be neat, but it doesn't have to be perfect by any means.


This is what you'll wind up with. Notice at the bottom, back of my box, the paper is curved to meet the floor. This is how you achieve the illusion of a seamless background. I have also pulled the flaps of my box straight in this photo.


You have now built your very own photography studio! Now you have an isolated environment--free of clutter--that any item of choice can be set in and photographed. The free of clutter part is a huge part of the equation. 

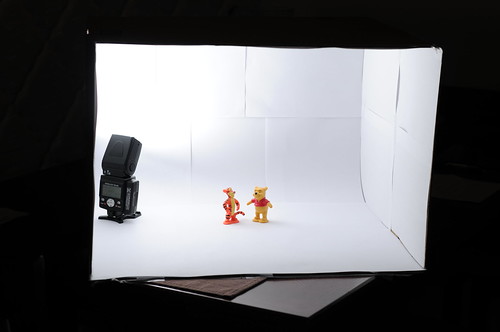
Now here's where we make your item shine. Let's use Winnie the Pooh and Tigger (in my above photograph) as an example. To the left is a pull-back shot to show you my set up. 

Placing them in the center of the studio and not too close to the back wall (the backdrop) is the best. 

To make them "float on air", I had to achieve two things. First I had to "fuzz the background" (called shallow depth-of-field) by using a wide aperture, f/3.5 on my camera. This achieves crystal clear focus only on them. The key is to keep the viewer's eye only on your item. 

Second, I had to surround them in light. Now this is where our white-covered walls and ceiling comes into play. Using off-camera lighting (more on that here), I placed my strobe inside the studio off into the rear corner and aimed almost straight up. Set at 1/128th power (it doesn't take much in such a small space), that was plenty of light.

While I would never sell Winnie the Pooh or Tigger, (these are our son's prized bath time toys!), you can use this same set up to take a winning photographs of anything you'd like to sell. Unwanted jewelry, precious stones, cookware, clothes, tools...you name it. This will absolutely set you apart in the world of eBay, Amazon, Craigslist (etc, etc.)

50mm, ISO 100, f/3.5, 1/250th of a sec, strobe at 1/128th power
Here's one last example for you...the Green Goblin. Again, not for sale (Gavin would kill me!), but if it were I'm sure I would have no problem getting bids on eBay with a photo like this. Lego lovers would be all over this thing begging their parents to buy it for them. What a cool-looking toy.

I hope you have picked up some tips and tricks (and maybe even a little inspiration) to get out your unwanted stuff and make a few bucks. If you have nothing to sell, I still encourage you to try this little project...it's a great way to hone your photography skills. 

Next week I will be touching on Macro Photography (which is a good part of what we have been discussing today), so stay tuned!

Resource: Never sold anything on online? Here's a beginner's guide from Forbes to get you started. Click here

Thanks for reading!

Brant

Like it here? Resister your email for automatic updates up at the top. Please pass this blog post on to your friends (if you think they would like to read it) using the Tweet, Facebook, and Google+ buttons.