Make sure you sign up on my mailing list (just below on the right) before you leave! Your address is SUPER safe with me.

Monday, September 29, 2014

Photo Tip Monday: Pack An Extra Battery

Summarizing today's post: Photo tips, being prepared, & remembering the camera.

flickr.com/photos/dj-dwayne/6022061167/sizes/m/
Not too long ago my aunt told me a sad story.

She had taken a little trip down to the Outer Banks with my uncle to get away for a few days. They like to visit Ocracoke Island, and that was their destination.

It was a beautiful day out when they loaded up on the ferry (yes, Ocracoke is only accessible by ferry). What an awesome day to take a few photos of the ocean shore from the ferry's viewpoint.

She pulled out her camera, and...dead battery. What a disappointment!

My aunt is usually all-prepared in every situation imaginable. Bless her heart, she remembered to take her camera for the trip. But she is human, and she forgot to charge her battery the night before. Rats.

So in the spirit of this sad story, I have a photo tip for you (after all, it IS Photo Tip Monday): 

Get yourself a backup battery. 

They are usually cheap. But even if it weren't, I'd still recommend you get one. It doesn't matter how fancy your camera is...if you don't have a battery for it, you're screwed. I'd rather have a $50 camera with a charged up battery than a $5000 inoperable one.

Here's a resource for you where you can find any battery for any camera:

Batteries Plus: http://www.batteriesplus.com

Go buy yourself an extra battery and keep it charged and in your camera case at all times.

Thanks for reading and have a great Monday!

Brant

Wow, look at you...you made it all the way thru my post! I really appreciate you as a reader. Don't forget to register your email for automatic updates up at the top. Please pass this blog post on to your friends using the Tweet, Facebook, and Google+ buttons. That would be awesome.

Friday, September 26, 2014

Tribute To Summer Fun: Taking Group Photos

Summarizing today's post: Summer fun with family, taking group photos, making mistakes, & happiness thru photography.


shot at 18mm, ISO 159, f/7.1, 1/250th of a sec, strobe at camera left @ 1/2.5th power
We are officially into the Fall season now. Cooler temps greet us as we walk out the door in the morning and the leaves will start turning those deep orange, yellow, & red colors very soon. So pretty. It truly is my favorite time of the year. 

Fall is the season that cameras were made for. Photographers--that have perhaps lay dormant all year--spring into action. There are just so many beautiful scenes (in the most common places) just ready to be captured! I smile just thinking about it.

Summer is also a wonderful time of the year and has provided many fun times for me and my family. Today, as we bid farewell to Summer, I wanted to share a couple of photos of our beach trip to Nags Head, NC this past July. This trip was, by far, my happiest time this season. 

And when something makes you happy, what should you do? Right. Capture the moment so you can remember it always! Happiness is elevated and extended by that beautiful little box known as the camera. Priceless it is to be able to pull up a photograph of an event 10 years afterwards and draw happiness from it. I know nothing else like it.

You have perhaps seen some photos already of our family's beach trip (see my post here). I took plenty! I wanted to share few more as we close out this season. 

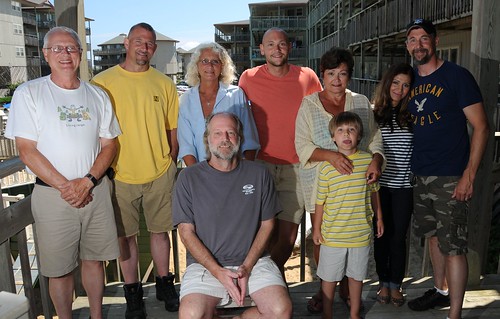
Group shots can be a chore, but they pay off. I took the above shot of the family just before we left the Outer Banks and headed back home. My mood that day, as I remember, was not the best because our trip was coming to a close. However, after getting everyone together one last time perked me right up. 

Shown above are my parents, two brothers, aunt & uncle, and my wife & son. I'm at the far right side so I could have easy access to the camera (I used time delay so I could jump in too). It turned out to be a pretty nice shot I thought (even with Gavin sticking his tongue out!).

The lighting was a challenge due to the fact that it was so bright outside and I was facing full-on sun. We were on the porch which shaded us, so that helped a bunch. However the background was so bright that our faces were extremely dark without the help of flash. 

Thinking back on some of my own advice (see my post here) about shooting in full sun, I set up one strobe to camera left and set it almost to 50% of it's capacity. That's a lot, but I was trying to light a large area. [The high power setting was also necessary due to my low ISO sensitivity, where I was trying to tame the bright background.]

Thinking back, I should have brought out 2 strobes...one for each side of our group. Lesson learned (poor dad... I had to "burn" him just to make some light reach over to my side). Sometimes we have to improvise as photographers, and--since I was short on equipment--I had to do the same. I wound up having to use my on-camera flash to assist in the distribution of added light. 

It was a mistake to skimp on my lighting set up, I should have packed my other strobe. But that's okay, we learn from our mistakes, that's the important thing. 


18mm, ISO 159, f/7.1, 1/250th, strobe 1/2.5
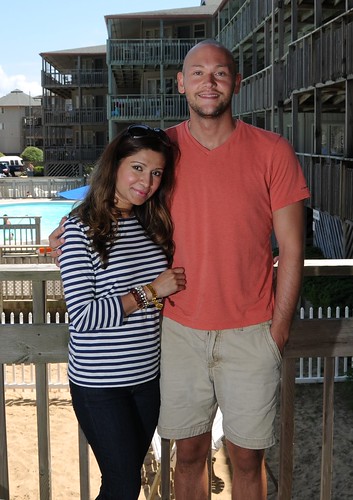
My set up was actually better for lighting a small area. Here's a better shot of just Ron (my brother) and Pinky (my sweet wife). They have always been best buds and I wanted to get a shot of them. This one turned out pretty good I thought.

I could show you more photos but I'm flat out of time for today.

I'll leave you with this thought:

Happiness is a state of mind. One thing that brings me extreme happiness is being with my family. What brings you happiness may be something different, and that's OK. 

The point is that you can amplify your happiness (and extend it) by capturing on "film" whatever it is that makes you smile. This way you can enjoy the moment forever.

Photography is awesome like that.

Thanks for reading, have a great Friday!

Brant

Wow, look at you...you made it all the way thru my post! I really appreciate you as a reader. Don't forget to register your email for automatic updates up at the top. Please pass this blog post on to your friends using the Tweet, Facebook, and Google+ buttons. That would be awesome.



Monday, September 22, 2014

Photo Tip Monday: Frustration & Photography

Summarizing today's post: Persistence in your photography, dealing with frustration, & carrying your camera with you at all times.

Shot at 170mm, ISO 400, f/11, 1/6th of a second
Trying to get that perfect photograph can really be frustrating. 

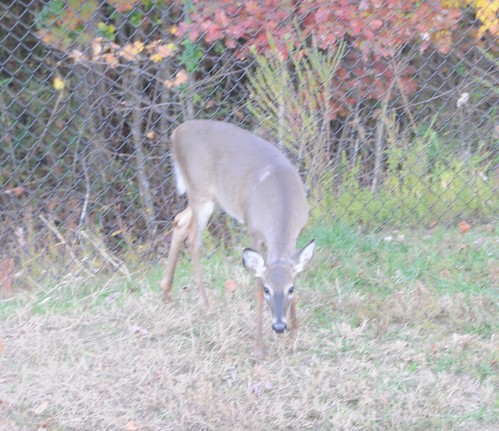
I had the privilege of running across this little doe not too long ago. It was Fall, two years ago.

I was so stoked that I had actually remembered to throw my camera in car with me that day. So I grabbed it and went to shooting!

This little girl would not cooperate for nothing in the world. She would not face me, walk behind a tree, move so fast I couldn't keep up...you name it. I simply couldn't adjust my camera settings fast enough for the changing situations.

I finally got the above photo, which is so far from perfect I'm even embarrassed to show it (it's even out of focus). But I'm doing so to make a point. We don't have to be perfect.

Most of us get frustrated when things aren't going our way, it's human nature. Especially if that "thing" that's frustrating us happens to be something that is important to us. And since photography is important to me, I tend to get aggravated at myself when I cannot get a successful capture. 

I think I missed the point that Fall day. God allowed me to have the opportunity to interact with one of His creatures for my pleasure, and I could do nothing but fret that I couldn't get a good photo of her. It just about ruined the experience for me.

So what's the photo tip for this Monday? Remember to take your camera with you always... Of course. But don't get so frustrated at getting the best photo that you miss the enjoyment of the moment. Be persistent in your attempt, but stop short of allowing your endeavor to ruin the experience. It could be that it was just meant for you to enjoy the moment and take a "mental snapshot" that day.

We don't have to be perfect...it's okay.

Have a great Monday guys, and thanks for reading.

Brant

Wow, look at you...you made it all the way thru my post! I really appreciate you as a reader. Don't forget to register your email for automatic updates up at the top. Please pass this blog post on to your friends using the Tweet, Facebook, and Google+ buttons. That would be awesome.


Friday, September 19, 2014

Our Praying Visitor: Balancing Available Light With Flash

Summarizing today's post: Balancing outdoor available light with flash, nature, taking notice to the world around you, & carrying your camera with you always.

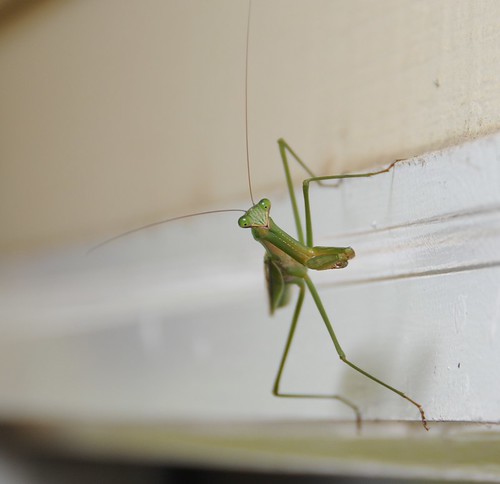
shot at 95mm, ISO 200, f/5.6, 1/30th of a sec, strobe bounced off of ceiling at 1/4 power
I think I've been spotted! This big guy was looking me right in the eye (it seems) when I snapped this photograph.

I walked outside one Sunday morning a few weeks ago and found him directly over our front door. I believe the good Lord sent him to "pray" over our home that day. A praying mantis is such a cool creature, they fascinate me. So, of course, I had to play a bit. And he was such a good sport about it...so trusting of me it seemed.

Not too long ago, we discussed mixing ambient (available) light with your own light to make a nice photograph (see here). I call this balancing or leveraging light. Today I thought I would provide a practical example of this in a different situation. No two situations are exactly the same...this is the constant challenge the photographer faces.

When I first found my friend hanging around, I snapped a few photos with just available light. While I could obtain proper exposure by raising my ISO sensitivity to 1250 and slowing down my shutter speed, I was not quite satisfied. Since our front door is recessed a good ways back under a roof overhang, one side of the mantis was shadowed quite heavily (even in the middle of the day). 

The experimentation begins...time to add my own light. I decided first to try a low power bare strobe/flash set back to camera left. This provided a hard light. I set my shutter speed at 1/20th of a second because I wanted a good mix of available daylight. Shutter speed is key when wanting to leverage what light you have already available to you. First shot:

shot at 65mm, ISO 400, f/5.6, 1/20th of a sec, bare strobe added camera left at 1/64 power
Not too bad, I like it. See the hard shadow lines underneath him? That's from my bare strobe. Nice effect, however it wasn't quite what I was looking for today. I was not taking advantage of the nice white ceiling 3 feet above my buddy here. Hmmmm. 

Being that the option was right there in my face, I quickly turned my small, hard light source into a huge, soft light source (for more on light source size, see here). Increasing the power of my strobe and pointing it straight up resulted in the image at the top of the page. 

And here's one more, mixing available light with my own indirect lighting:

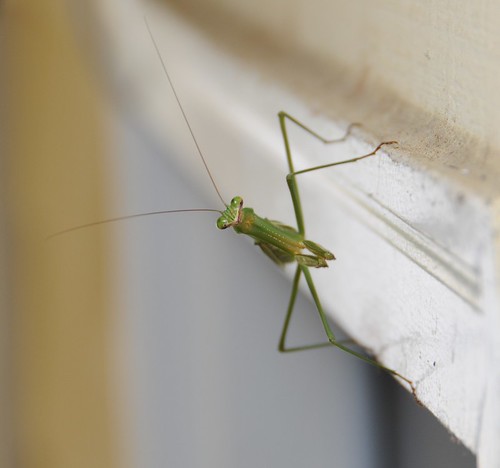
shot at 95mm, ISO 200, f/5.6, 1/30th of a sec, strobe bounced off of ceiling at 1/4 power
You can see that there are no shadow lines due to my indirect, soft light emitted by my flash/strobe (bounced off the ceiling). I like this better. 

What about you? Do you like the harder light or softer light? There's no right answer. Just depends on taste really. The main takeaway is that there was a need to mix in my own light here in some way due to the dim daytime light. 

There are so many lessons to be learned here. Namely, have your camera handy at all times! (I need to heed my own advice, but I'm getting better.) Keep your camera ready to "fire" all the time...keep your battery charged and memory card clear. You would hate yourself if you failed to capture an image like this just because of something like a dead battery. I know I would.

Secondly, take notice of nature around you. This little creature of nature came into OUR world that day...and I noticed him. I have learned to keep my "antennas" up in the world in which we live because there is beauty all around. It brings me extreme happiness to be able to show you such a wonderful creature like this praying mantis. 

I have always said happiness is linked to photography...whether you are behind the camera or just looking at the results like right now.

Did you smile while looking at these photos? Happiness increased. You see?

Have a wonderful Friday! Thanks for reading.

Brant

Wow, look at you...you made it all the way thru my post! I really appreciate you as a reader. Don't forget to register your email for automatic updates up at the top. Please pass this blog post on to your friends using the Tweet, Facebook, and Google+ buttons. That would be awesome.
 

Monday, September 15, 2014

Photo Tip Monday: Selective Focus

Summarizing today's post: Photo tips, selective focus and what is means, & paying attention to the world around you.

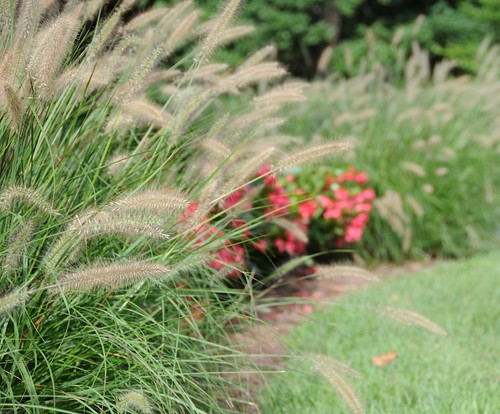
shot at 65mm, ISO 200, f/5.6, 1/400th of a sec, in full sun
Yesterday was a wonderful day outdoors, I hope you got to enjoy it. Especially towards the end of the day when the solid cloud cover broke up into big puffs of clouds. The temperature was in the low 70s, and even in the sun it felt nice and cool because of the breeze. You couldn't ask for better!

I headed out for a quick walk with camera in hand...I had to get out and enjoy the weather. I quickly saw an opportunity for a photo tip and wanted to share.

Selective focus is the order of the day. But what is that?

Selective focus is where you set the aperture on your camera to fairly wide setting of say...f/8 or wider (lower f/stop number), and then purposely focus on one particular area in your frame to draw emphasis to it. The wider the aperture, the more shallow the depth of field will be, and the more you will "fuzz" or "blur" the out-of-focus areas. [For more on aperture, see my post here.]


shot at 65mm, ISO 200, f/5.6, 1/400th of a sec, in full sun
Look at my two photographs. You can see that in the first one (top of page) I have my focus set to the foreground, whereas in this one I have the attention on the background a lot more. The foreground is now blurred and the pretty begonias are in crystal clear focus.

You can achieve this by either manually focusing, or using your "focus lock" button on the back of your camera if you have one. Most DSLR cameras have this feature, and some high end point-and-shoots do as well. Simply bring your focus on your selected area, hold down your focus lock button, then you can pan your camera wherever you like before snapping the picture.

Neither photo is right or wrong, it simply gives the viewer different focal point. You are controlling what you want to draw emphasis to in your frame.

Very neat. This will give your photos a nice little professional touch.

Go play and have a great Monday. Pay attention to the beautiful world around you today. A funny thing happens when you have your camera with you...things "pop out" to you that ordinarily wouldn't. Pretty cool how that works :)

Thanks for reading!

Brant

Wow, look at you...you made it all the way thru my post! I really appreciate you as a reader. Don't forget to register your email for automatic updates up at the top. Please pass this blog post on to your friends using the Tweet, Facebook, and Google+ buttons. That would be awesome.

Friday, September 12, 2014

The Family Photographer

Summarizing today's post: Reasoning for carrying your camera with you all the time, taking photos of family, happiness in photography, & a few photo tips.

62mm, ISO 400, f/8, 1/60th of a sec, ambient balanced with flash
I recently read a good blog post by Joe McNally, where he elaborated on shooting some nice photos of his mother-in-law's 80th birthday party (read it if you like here). He explained what it's like to be the "resident photographer" in his family.

It's funny how we relate things that we read--or see in a movie, or while watching the evening news--to our own lives immediately. And this time it was no different for me. His blog post made me reflect on my own life a bit. 

Over the years I have often taken my "big camera" (as my wife fondly calls it) to many family functions. It can be cumbersome at times to take, and even get in the way. [To see some of the equipment I use, see here.] And then there's my poor family...the victims at the end of my camera's lens. They see that bigger-than-what-they're-used-to camera staring at them and they get nervous. 

I applaud them. They put up with me quite nicely. (At least they don't throw things at me.)

What I have realized is that I have become the "family photographer" without even realizing it. We have others in the family too (like my sweet mom) who snap photos when they can at family get-togethers, so I'm not the only one. So credit given, because they have gotten some great family snapshots...long before I could even hold a camera.

I guess I have "taken the ball (or the camera) and ran with it" without anyone asking me to however. Maybe the torch has been passed to me over the years gradually without me even realizing it. That's okay, I don't mind...photography comes naturally to me.

It is so important to stop for a moment--no matter how aggravating--when you are enjoying your family time and take some photographs. You will realize that those photos help solidify precious memories. So, yes...being the family photographer can be a little work. But it pays dividends for everyone involved.

Pictured above are my sweet grandparents at Thanksgiving, 4 years ago. November 25th, 2010. My grandmother (who we all lovingly call Mubber) passed way last month. She was  one of "the best" and meant a lot to all of us. When I ran across this picture of the two of them, it made me smile so big. Memories flood back into my mind. I'm so glad I hauled in my big camera that day.

I have a handful of photos of Mubber, but it's never enough. I wish I had taken more when I had the chance. 


65mm, ISO 400, f/8, 1/60th of a sec
Here's another picture of Grandaddy, taken that same day. He is still with us but is very frail now. I hope the Good Lord keeps him healthy and allows him to stay with us a long time. To say he means a lot to us as well is an understatement. 

I encourage you guys to take your camera with you almost everywhere you go...and it's for good reason. Please take all the photos you can at family get-togethers. I promise you won't go away saying..."Dang, I took too many pictures."

Here's a tip for you: Don't always feel that your loved one has to be "posing" for you to get a good photograph. Sometimes the best shots are the ones where they are in their natural state, not even paying attention to you. 

Another photo tip during family functions: Have a designated time to get a group shot when everyone is there. Do this in the beginning before folks are ready to leave. If you do this year after year at important holiday celebrations, it will eventually be expected and welcomed. Then email the photos to your family members so they can see the fruits of your efforts. I will guarantee that you will shine a little happiness into their lives the day they open that email.

I challenge you to become the "family photographer" in your house. If you already have one in your family, be tolerant of them when they whip out their "big camera". They are helping to create wonderful memories for you all.

Have you ever been looking thru photo albums of cherished family events and been glad you remembered your camera that day?

Thanks for reading, and have a wonderful Friday!

Brant

Wow, look at you...you made it all the way thru my post! I really appreciate you as a reader. Don't forget to register your email for automatic updates up at the top. Please pass this blog post on to your friends using the Tweet, Facebook, and Google+ buttons. That would be awesome.

Monday, September 8, 2014

Photo Tip Monday: Patience & Photography

Summarizing today's post: Photo tips, patience in photography, & balancing ambient light with flash.

70mm, ISO 800, f/5.6, 1/30th of a sec, strobe 1/16th power
It's Photo Tip Monday, and that means I have a quick tip for you to help improve your photography skills.

Everyone has heard the phrase "Patience is a virtue". 

That can't be more true in photography.

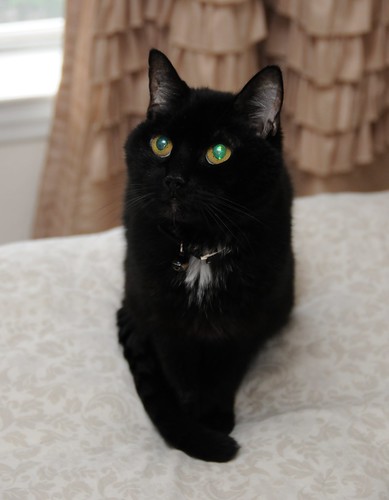
I wanted to get a simple shot of Penelope yesterday and she was giving me a hard time. She wouldn't look at me for the world! I tried everything. 

Then I remembered my own advice (see the post where Gavin was trying my patience here) and walked away. Best thing to do.

What was the alternative? I couldn't force her to "pose nicely" for me. Nope, so I just walked away and tried again later.

I have learned over the years that I had rather not get a photo at all if it is "forced". That is one of my pet peeves (no pun intended). I'd rather just try again at another time.

And then it happened. I walked past the bedroom about an hour later and found that Penelope was awake and sitting up just as pretty as a picture on the bed. Tail all curled around her and everything.

I set my camera up for the correct exposure, wanting to mix the available light in the room with my own light. I figured that pointing my strobe straight up at the ceiling at about 1/16th power would do it. With a high ISO setting, wide aperture, and fairly slow shutter speed, my light mixed in just right.

Then all I did was simply catch her eye with my finger and raised my hand up toward the ceiling. She followed it for a split second (thinking I had a treat for her I'm sure), and click...pretty nice shot. 

I was happy. And she was too...because I then left her alone.

Patience and Photography...both start with "P". Lesson learned, again.

Thanks for reading, have a great Monday!

Brant

Wow, look at you...you made it all the way thru my post! I really appreciate you as a reader. Don't forget to register your email for automatic updates up at the top. Please pass this blog post on to your friends using the Tweet, Facebook, and Google+ buttons. That would be awesome.


Friday, September 5, 2014

Get The Yellow Out: White Balance For Indoor Photography

Summarizing today's post: Indoor photography, using ambient lighting only, adjusting white balance to achieve proper color tones, & using Photoshop.

62mm, ISO 1250, f/5.6, 1/5th of a second, WB set to tungsten
Last week we touched on what white balance is and how to adjust it (last week's post here). 

I detailed how to alter your images when shooting in outdoor/daylight conditions...all without the aid of Photoshop. I got into a little 'rant' about leaving image editing software to the pros (unless you just love to do editing yourself).

WB set to daylight
While last week the focus was on shooting OUTdoors, today we're looking at shooting INdoors. The subject matter is the same...adjusting white balance.

When taking photographs outside, you can adjust the white balance (WB) to modify the look and feel of the sky to give it a neat effect. While it can be very cool and pleasing to the eye to do this, it's technically not natural. 

Last week we were giving our photos cool effects by skewing the color tones a bit, today it's about bringing the lighting balance back to it's natural state. 

WB set to shade

Let's look first at a photo with a correct white balance setting. I am borrowing Gavin's teddy bears to demonstrate today, I'm sure he won't mind :)

The first photo above is shot right beside a table lamp using no other lighting. I had to set the ISO on my camera way up to a sensitivity of 1250, which you'll find that you have to do sometimes if shooting inside in low light (if you're not using a flash). After adjusting the aperture to a moderately wide 5.6, and my shutter speed to a very slow 1/5th of a second, finally found the correct exposure.

I set my WB to "tungsten" because I was directly under a table lamp that used a compact fluorescent blub (but still mimics a tungsten, incandescent bulb's light color). The result came out just fine. Nice balanced color tones. I do not recommend leaving your WB to "Auto" when shooting inside because of the danger of your camera selecting another setting such as in the other two photos ("daylight", the most common...or even worse "shade"). The result would be that ugly yellow color tone. Yuck.

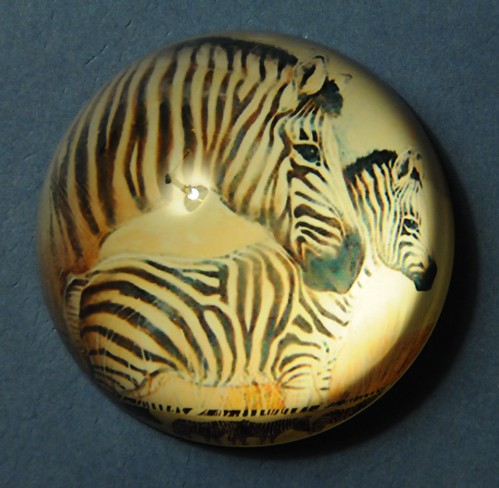
200mm, ISO 1250, f/5.6, 1/30th of a second, WB set to tungsten
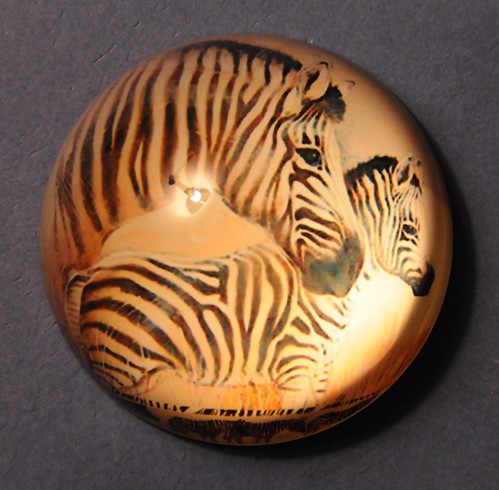
Here is another example of a simple paper weight shot under the same lamp. Look close and you'll see the reflection of the bulb in fact.

This photograph came out just fine set at a tungsten white balance. I tried it set at "Auto" and it turned out too yellow for my taste. The camera can get confused sometimes, that's why never use automatic WB indoors.

I have included another photo of the same paper weight with the WB set to "fluorescent", which was very close to the color tones when left in Auto mode. 
WB set to fluorescent

Again too yellow. Not quite as bad as the example with Gavin's bears above, but still, the lesson is the same.

A good rule of thumb that I have discovered by simply playing around with my white balance settings is this: 

The further down the WB scale you go...tungsten, fluorescent, daylight, cloudy, and shade (as in the last teddy bear photo)...the more "yellow" your photographs become. 

The lesson learned here is that it's okay to shoot indoors in low light, but you'll have to play around with your white balance. Generally, if you're shooting with table lamps all around, start with the tungsten setting. If you are shooting under those big fluorescent fixtures (like in kitchens and in industrial settings), choose fluorescent. That's not a silver bullet, but it's a place to start. No light is the same!

I challenge you to play around with this a bit today and surprise yourself. You can even adjust white balance on your smartphone's camera, believe it or not.

Thanks for reading!

Brant

Wow, look at you...you made it all the way thru my post! I really appreciate you as a reader. Don't forget to register your email for automatic updates up at the top. Please pass this blog post on to your friends using the Tweet, Facebook, and Google+ buttons. That would be awesome.


Monday, September 1, 2014

Photo Tip Monday: Action Shots

Summarizing today's post: Photo tips for action shots, carrying your camera with you at all times, & enjoying your family. 

Happy Labor Day! I hope most of you have the day off from work today. But for those of you who don't, I feel your pain. I have worked many a Labor Day myself. I always used to say that I'm celebrating Labor Day by "laboring away". Not a very good joke for those of us who had to work.

shot at 75mm, ISO 200, f/5.6
It's Monday and that means I have a quick photo tip for you. It can be applied today even, especially if you are out with your family or friends on the water.

shot at 82mm, ISO 200, f/5.6, 1/1000 of a sec
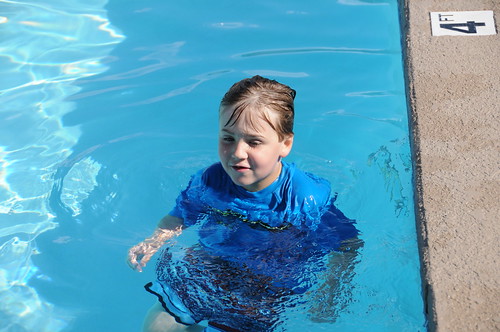
We had the opportunity to "get wet" ourselves this weekend. Gavin loves the pool more than any child I believe I have ever seen. We probably won't have too many more opportunities to go swimming this year with Fall right around the corner. So when it was sunny and 90 on Saturday, the wife and I jumped on the chance to take Little Bud out for a quick dip.

So what's the photo tip? 

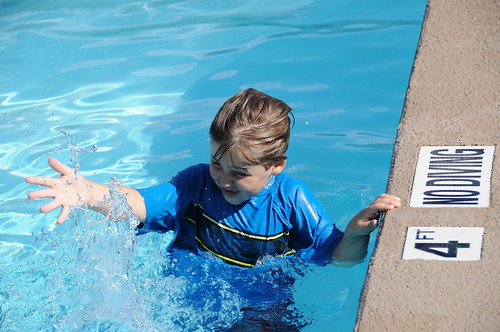
Ok. Have you ever seen water "frozen" in mid air in a photograph? You may have seen this in magazine pictures of boats speeding thru the water, youngins playing with water guns, or simply when splashing around in the pool (etc).


shot at 82mm, ISO 200, f/5.6, 1/1000 of a sec
It's a pretty cool effect, and I asked Gavin to stop playing on Saturday for just a moment help me demonstrate.

After setting my camera to properly expose for the sunny conditions, I asked him to send a couple of "splashes" my way. (He's a master at splashing...so I had to get my distance!)

Now in order to make the water "freeze" in mid air, I had to set my shutter speed to a very fast 1/1000th of a second. That's FAST. Although the same effect could have been achieved at any speed above...say...1/500th of a second, I wanted to make sure every drop of water stood absolutely still. They look like little ice crystals even...nice.

To make this happen, you have to be in very good light so you can achieve the high shutter speed. The brighter it is (like in full sun) the better, and you won't have any problems. And by coincidence, when you go swimming like this, it's nice and bright out most often. You can still get similar results in low light, but you have to make some adjustments. No time for that today, I want to keep this short. We'll save that for later.

Good job Gavin! Thanks for your help. 

Try playing around with your shutter speed today and see if you can freeze water in the middle of summer. Of course, don't forget your camera today as you go play!

Thanks for reading.

Brant

Wow, look at you...you made it all the way thru my post! I really appreciate you as a reader. Don't forget to register your email for automatic updates up at the top. Please pass this blog post on to your friends using the Tweet, Facebook, and Google+ buttons. That would be awesome.