 |
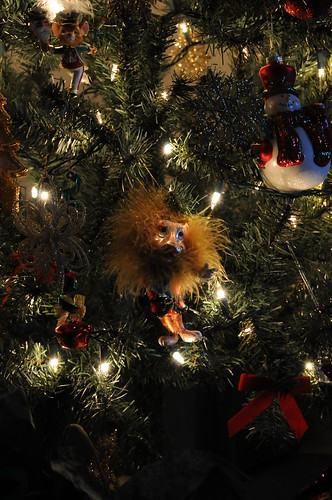
| shot at 56mm, ISO 800, 1/2sec, f/11, ambient light |
It is called shooting in Manual mode. Dig out your owner's manual and find out how to set your camera up this way. Even on your point-and-shoot camera (i.e. pocket camera), it can be done. Most have a dial on the side you rotate to "M".
This is not something you will want to mess with when 3-year-old little Johnny has done something for the first time and you want to quickly get a picture of him to put on Twitter. This will be a little project for you when you have a few extra minutes that you can devote to it. And you will not be very good at it, at least at first.
Look at the picture above. I shot this completely in Manual mode. I used only ambient light (only the lights on the Christmas tree and a small amount of room lighting). You might think it looks underexposed (or dark), and you'd be correct, technically. But this is the way I wanted it to turn out. After all, you are reading my blog...The World Thru Brant's Eyes, right?
It's a matter of perception, and what kind of mood you want to project. Basically, the way I view it, photography is an art form and--just like any art--beauty is in the eye of the beholder. That is one of the things that I love about photography, you can't mess it up! If it looks good to you, that's all that matters.
Briefly, let me explain what the major factors are when shooting in Manual mode. And let me tell you now that I call myself an amateur because that's what I am...meaning I am not an expert. I am continually learning about these factors, and as I learn more, you will read about it here, I'm sure. Having said that, here are the basics you should know:
ISO sensitivity. You have the option to set your ISO anywhere from 100 (or sometimes lower) all the way up to 6400 on some cameras. You want to set your ISO to the lowest you can, because this gives you the best quality image possible. If you are taking pictures in low light (indoors, or outdoors at dusk) you will have to choose a higher setting. As a rule, I shoot most often at 200. Then if needed, I will adjust to a higher ISO if the light is just too low (like in the image above). I try not to shoot above 800 or 1000 unless I have to. Why? Because the image comes out "grainy" when blown up to original size.
Shutter speed. This is a cool one. With this one setting, you can stop a soccer player in mid-air, make the wings of a humming bird stop (really!), and actually turn off the lights in a room. You may think I'm nuts, but its true. You will hear me talk about this a lot. For now, know that in lower light you need to set you shutter speed slower, meaning 1/30th of a second, for example. In brighter light (daylight) you will need to set it higher, such as 1/1000th of a second. Most cameras will allow you to set your shutter speed anywhere from 1/1 of a second (one full second, which is very slow) to 1/8000th of second (extremely fast, much faster that you can blink your eyes). Rule of thumb: The slower the shutter speed, the more light comes into the camera. And the faster the shutter speed, the less time light has to make it inside to the camera's delicate sensor. I could write a whole page on this one, but for now let's stop.
Aperture. This one is pretty neat too. You can adjust your aperture (also called f-stop) anywhere from f/1.4 (depending on your camera/lens capability) all the way up to f/22 or higher (again, depends on your camera/lens). What does that mean? This one is a little tricky because the higher the number, the less light can enter thru the lens. A large aperture (low f-stop number), like f/2 or f/2.8, "opens up" the lens and allows a lot of light to come in, therefore making it ideal to work in low-light scenarios. When a lot of light can be funneled thru the lens, it allows you to work at higher shutter speeds and therefore can open up new possibilities...or may allow a shot to be taken that otherwise could not.
One other very neat thing that I will mention about aperture is how it effects your depth of field. This is one of my favorite ways to add that professional touch to my photographs. What is depth of field? Best and most simple way to describe it is this: If you have ever opened up a recipe book or magazine that shows those macro (up-close) photos of food and have noticed how blurry the background is, then you know what depth of field is. What to make the background of your photos out-of-focus? Open up your lens (lower your f-stop number). You will make your photos look professional almost instantly. How cool is that?
That's enough for today. I could go on and on, but I will stop because there is a sucha thing as information overload.
Try shooting in Manual mode, you may be surprised at what you learn.
Thanks for reading,
Brant
No comments:
Post a Comment