 |
| 62mm, ISO 1250, f/5.6, 1/5th of a second, WB set to tungsten |
I detailed how to alter your images when shooting in outdoor/daylight conditions...all without the aid of Photoshop. I got into a little 'rant' about leaving image editing software to the pros (unless you just love to do editing yourself).
 |
| WB set to daylight |
When taking photographs outside, you can adjust the white balance (WB) to modify the look and feel of the sky to give it a neat effect. While it can be very cool and pleasing to the eye to do this, it's technically not natural.
Last week we were giving our photos cool effects by skewing the color tones a bit, today it's about bringing the lighting balance back to it's natural state.
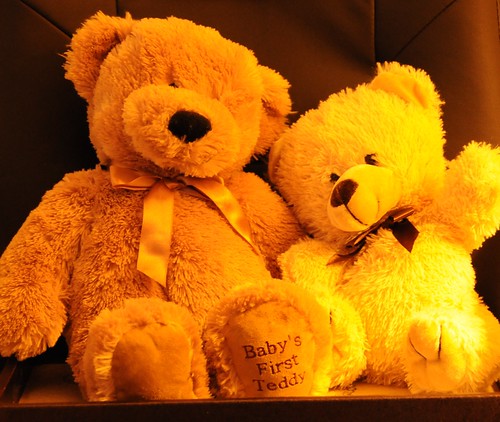 |
| WB set to shade |
Let's look first at a photo with a correct white balance setting. I am borrowing Gavin's teddy bears to demonstrate today, I'm sure he won't mind :)
The first photo above is shot right beside a table lamp using no other lighting. I had to set the ISO on my camera way up to a sensitivity of 1250, which you'll find that you have to do sometimes if shooting inside in low light (if you're not using a flash). After adjusting the aperture to a moderately wide 5.6, and my shutter speed to a very slow 1/5th of a second, finally found the correct exposure.
I set my WB to "tungsten" because I was directly under a table lamp that used a compact fluorescent blub (but still mimics a tungsten, incandescent bulb's light color). The result came out just fine. Nice balanced color tones. I do not recommend leaving your WB to "Auto" when shooting inside because of the danger of your camera selecting another setting such as in the other two photos ("daylight", the most common...or even worse "shade"). The result would be that ugly yellow color tone. Yuck.
 |
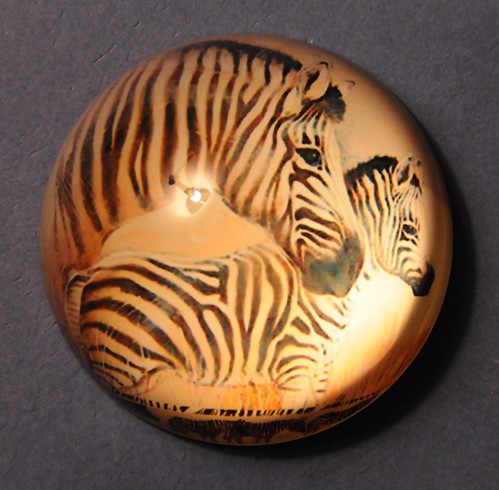
| 200mm, ISO 1250, f/5.6, 1/30th of a second, WB set to tungsten |
This photograph came out just fine set at a tungsten white balance. I tried it set at "Auto" and it turned out too yellow for my taste. The camera can get confused sometimes, that's why never use automatic WB indoors.
I have included another photo of the same paper weight with the WB set to "fluorescent", which was very close to the color tones when left in Auto mode.
 |
| WB set to fluorescent |
Again too yellow. Not quite as bad as the example with Gavin's bears above, but still, the lesson is the same.
A good rule of thumb that I have discovered by simply playing around with my white balance settings is this:
The further down the WB scale you go...tungsten, fluorescent, daylight, cloudy, and shade (as in the last teddy bear photo)...the more "yellow" your photographs become.
The lesson learned here is that it's okay to shoot indoors in low light, but you'll have to play around with your white balance. Generally, if you're shooting with table lamps all around, start with the tungsten setting. If you are shooting under those big fluorescent fixtures (like in kitchens and in industrial settings), choose fluorescent. That's not a silver bullet, but it's a place to start. No light is the same!
I challenge you to play around with this a bit today and surprise yourself. You can even adjust white balance on your smartphone's camera, believe it or not.
Thanks for reading!
Brant
Wow, look at you...you made it all the way thru my post! I really appreciate you as a reader. Don't forget to register your email for automatic updates up at the top. Please pass this blog post on to your friends using the Tweet, Facebook, and Google+ buttons. That would be awesome.
No comments:
Post a Comment